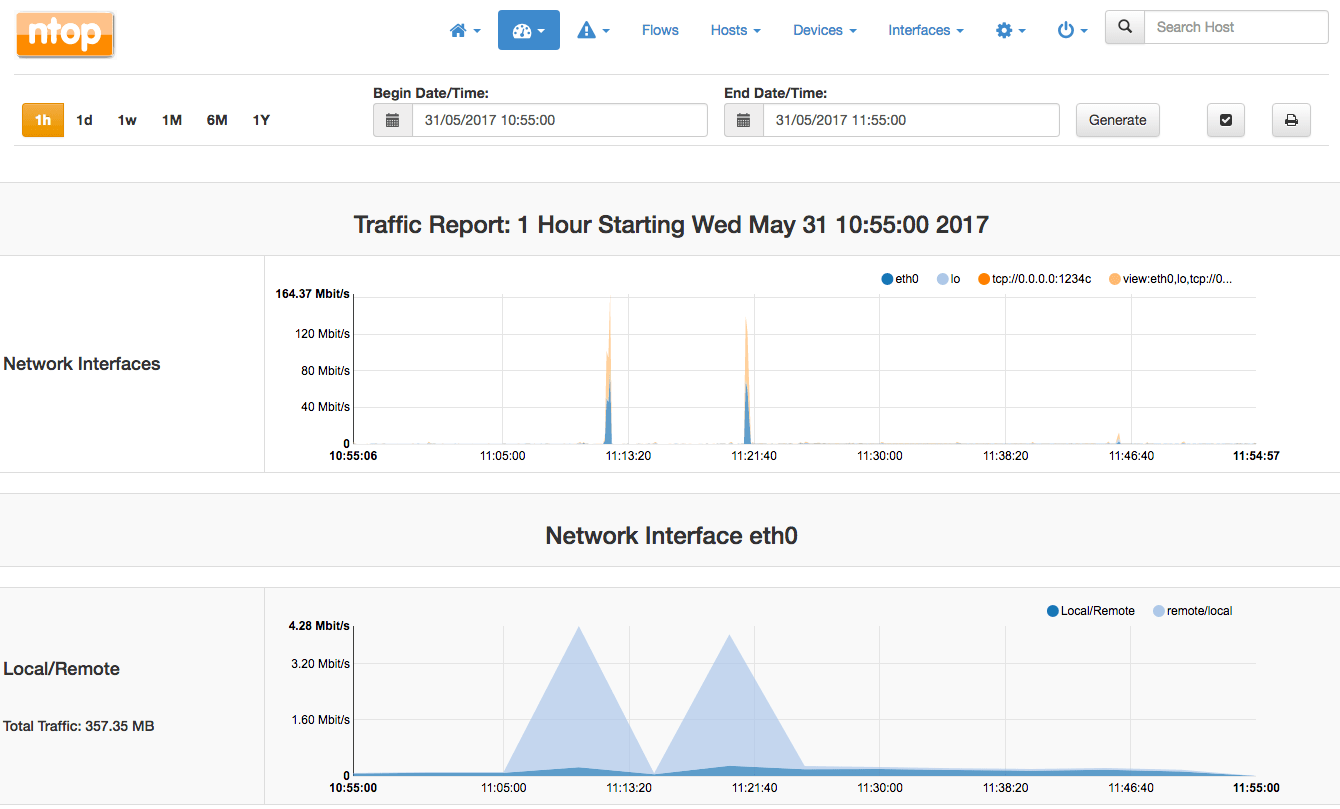
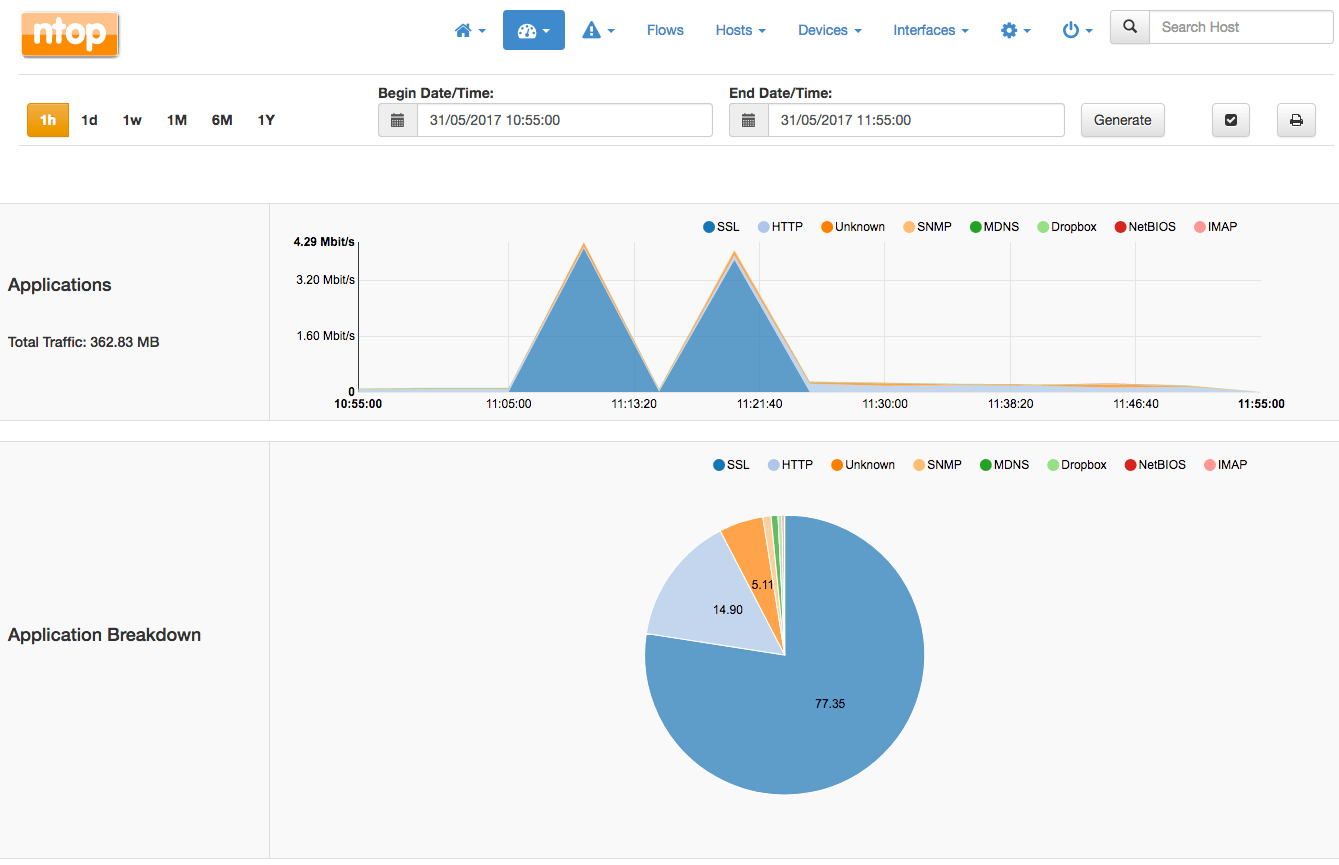
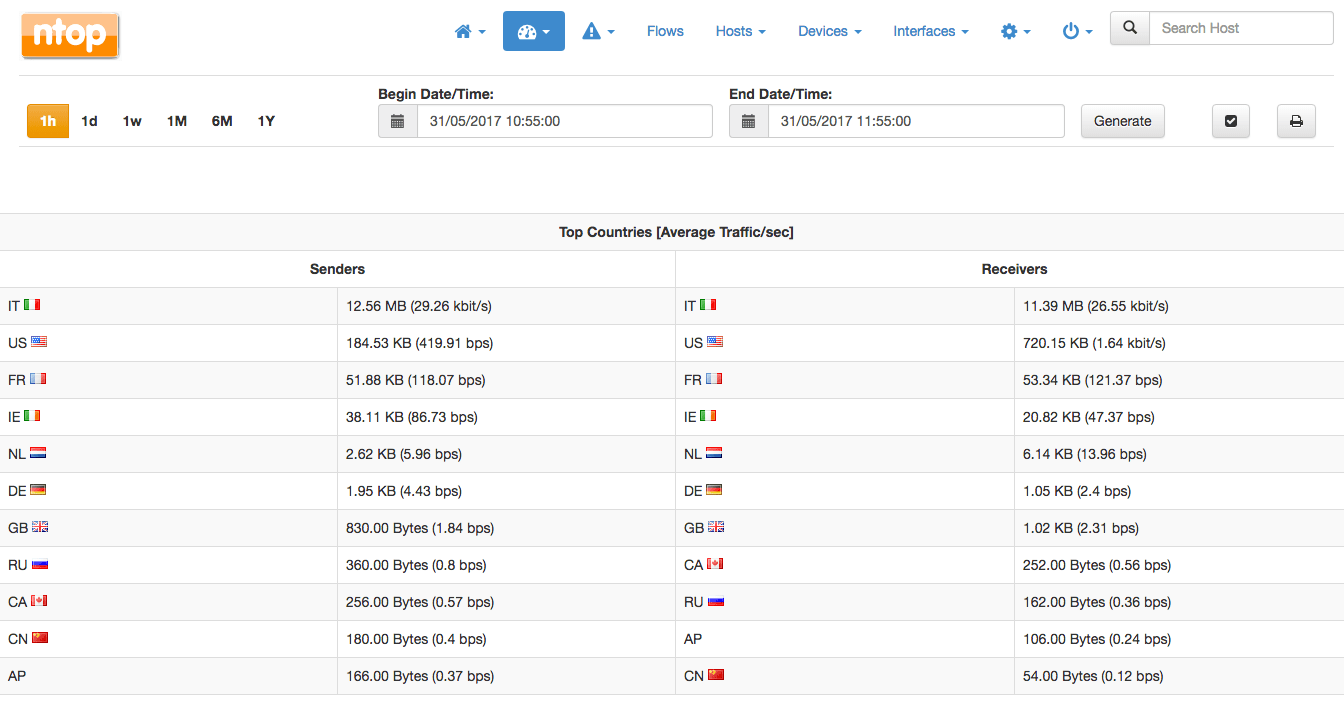
ntopng可以通过分析网络流量来判断网络上存在的各种问题,还可以监控是否有黑客正在攻击网络,如果网络突然变缓慢,通过Ntop截获的数据包,可以确定是什么类型的数据包占据了大量带宽,以及数据包的发送时间、数据包传送的延时、数据包的来源地址等。
一、ntopng安装与使用
以Ubuntu 16.04作为演示
1.1 安装Ntopng
直接使用命令安装即可:
sudo apt-get install ntopng
1.2 配置Ntopng
配置文件位于: /etc/ntopng.conf.
sudo vim /etc/ntopng.conf
根据你自己的需要来修改配置:
# DO NOT REMOVE the following option, required for daemonization.
-e=

# * Interfaces to sniff on: one interface per line, prefix with -i=
# If none is specified, ntopng will try to auto-detect the best interface.

-i=eth0

# * Port on which ntopng will listen for the web-UI.
-w=3000
保存配置文件,然后重启 ntopng :
sudo systemctl restart ntopng
ntopng还提供非常多的选项,你可以使用 ntopng -h 来查看:
sudo ntopng -h
1.3 开启端口
你需要在VPS的防火墙中开启相应的端口,例如上面用了3000,那么你就需要在防火墙规则中加入:
sudo ufw allow 3000
1.4 Ntopng使用
打开你的浏览器,访问IP+端口号,你就可以看到Ntopng的登录界面了,使用默认的用户名 admin 和密码 admin 登录即可。